Welcome to our beginner-friendly guide on vinyl decal installation. Whether you’re new to this or simply looking for some helpful tips, we’ve got you covered.
Transforming any surface into a beautiful masterpiece is now within your reach with vinyl decals. Our guide breaks down the entire process, making it simple and enjoyable for anyone to try, regardless of your experience level.
We’ll walk you through everything you need to know, from selecting the right materials to preparing the surface and applying the decal. Our expert tips and tricks will ensure that you achieve professional-looking results effortlessly.
Whether you want to add a personal touch to your laptop, spruce up your walls, or give your vehicle a fresh look, our guide is here to help. Unleash your creativity and start transforming your space with confidence.
Ready to dive in with some vinyl decal installation? Let’s get started!
Step 1: Clean Surface
Wipe the surface thoroughly with mild soapy water. Dry surface and wipe with rubbing alcohol.
- Do not use Windex or similar products as they will prevent the decal from adhering securely to the surface.
- Do not apply a decal in extremely cold or hot conditions.
- Apply to a clean smooth surface.
Step 2: Prepare Decal
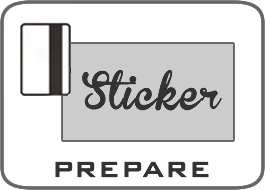
Firmly rub a hard plastic squeegee or credit card like object across the transfer tape side of the decal.
- On a flat surface large enough to fit your decal, rub the decal surface from the center to the edges using a firm and smooth sweeping motion.
- The idea is to make sure the tape is attached to the decal so that it can be lifted off the paper backing.
- Any small air bubbles remaining will not affect installation
SMALL DECALS – continue to Step 3
LARGE and /or WIDE DECALS
Use a masking tape Center Hinge to level and stabilize decal
- Place the decal on the surface.
- Level the decal using a level, measuring, or other means.
- Next, place 2-3 or more pieces of masking tape down the approximate center of the decal as shown to hold the decal in place.
- Place masking tape on both side edges as well.
- Now take one side and fold it over to the other along the “tape hinge”.
- Peel off the paper backing of the folded over side making sure the decal adheres to the tape.
- Use the masking tape you placed on the side edge to hold the tape and decal fold-over in place.
- Now, cut off the loose paper close to the tape hinge.
- Take the fold-over and begin to gently squeegee down that side from the center hinge to the edge.
- Repeat these steps for opposite side. Remove tape hinge.
Continue to Step 5
Step 3: Remove Transfer Tape (with Decal attached) from Paper backing
From one of the edges or corners, carefully separate the transfer tape from the paper backing lifting the decal away from the paper.
- If the decal clings to the paper backing, slowly reverse this process. Squeegee the surface a bit more then continue.
Step 4: Apply
With Decal now attached to the clear transfer tape, apply the decal to the surface.
- Place the center of the decal to the surface first, and then gently lay down the edges.
- With a squeegee or credit card, rub/scrape the tape and decal on to the surface from the center to the edges using a firm and smooth sweeping motion.
- Leave decal and tape attached together to the surface for 5-10 minutes to let adhesive activate.
Step 5: Peel Tape
SLOWLY peel the transfer tape away from the decal and surface.
- Stay close to the surface and peel at an angle starting from an upper corner.
- Use caution to not pull the decal off the surface by peeling fast or too aggressive.
- If the decal pulls away from the surface, reverse the process, repeat the squeegee/credit card process a bit more, and continue peeling carefully.
- If vinyl decal installation was on a glass surface, a flat razor blade can be used to quickly get under the decal.
- Peel an edge away and gently remove at a slanted angle similar to installation.
- For removal of any remaining decal residue, use rubbing alcohol and/or a product similar to Goo Gone depending on your surface.


 legendpatriot.com